添加附着
修改createRenderPass函数,更新对颜色附着和深度附着的设置:
void createRenderPass() {
        ...
    colorAttachment.samples = msaaSamples;
    colorAttachment.finalLayout = VK_IMAGE_LAYOUT_COLOR_ATTACHMENT_OPTIMAL;
        ...
    depthAttachment.samples = msaaSamples;
        ...
读者可能已经注意到,我们将finalLayout从VK_IMAGE_LAYOUT_PRESENT_SRC_KHR布局改为VK_IMAGE_LAYOUT_COLOR_ATTACHMENT_OPTIMAL。这样做是因为多重采样缓冲不能直接用于呈现操作。我们需要先把它转换为普通的图形形式。对于深度缓冲,不需要进行呈现操作,也就不需要对其进行转换。添加一个新的颜色附着用于转换多重采样缓冲数据:
...
VkAttachmentDescription colorAttachmentResolve = {};
colorAttachmentResolve.format = swapChainImageFormat;
colorAttachmentResolve.samples = VK_SAMPLE_COUNT_1_BIT;
colorAttachmentResolve.loadOp = VK_ATTACHMENT_LOAD_OP_DONT_CARE;
colorAttachmentResolve.storeOp = VK_ATTACHMENT_STORE_OP_STORE;
colorAttachmentResolve.stencilLoadOp = VK_ATTACHMENT_LOAD_OP_DONT_CARE;
colorAttachmentResolve.stencilStoreOp = VK_ATTACHMENT_STORE_OP_DONT_CARE;
colorAttachmentResolve.initialLayout = VK_IMAGE_LAYOUT_UNDEFINED;
colorAttachmentResolve.finalLayout = VK_IMAGE_LAYOUT_PRESENT_SRC_KHR;
VK_IMAGE_LAYOUT_PRESENT_SRC_KHR;
        ...
设置渲染流程引用这一新添加的附着。使用一个VkAttachmentReference结构体引用我们刚刚创建的颜色附着:
...
VkAttachmentReference colorAttachmentResolveRef = {};
colorAttachmentResolveRef.attachment = 2;
colorAttachmentResolveRef.layout = VK_IMAGE_LAYOUT_COLOR_ATTACHMENT_OPTIMAL;
        ...
设置pResolveAttachments成员变量指向刚刚添加的VkAttachmentReference结构体。
...
subpass.pResolveAttachments = &colorAttachmentResolveRef;
        ...
更新渲染流程结构体信息,包含新得颜色附着:
...
std::array<VkAttachmentDescription, 3> attachments = {colorAttachment, depthAttachment, colorAttachmentResolve};
        ...
修改createFrameBuffers函数,添加新的图像视图到attachments中:
void createFrameBuffers() {
        ...
    std::array<VkImageView, 3> attachments = { colorImageView, depthImageView, swapChainImageViews[i]};
        ...
}
最后,修改createGraphicsPipeline函数,设置图像管线使用的采样样本数:
void createGraphicsPipeline() {
        ...
    multisampling.rasterizationSamples = msaaSamples;
        ...
}
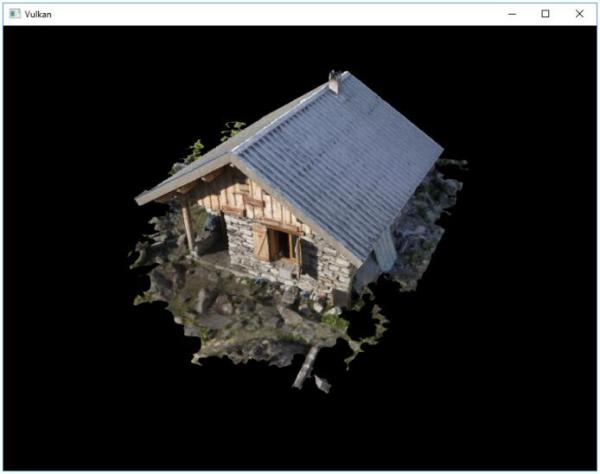
现在编译运行程序就可以看到下面的画面:

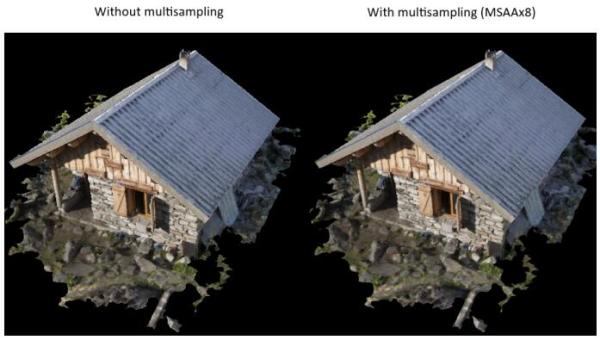
我们与之前不使用多重采样的结果进行对比:

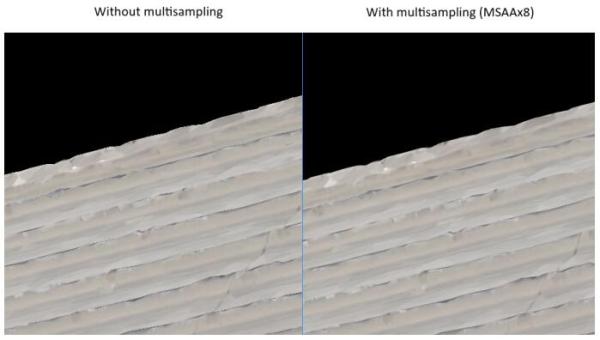
在模型的边缘处可以看到明显的不同:
